
Teacher first steps
Your organization creates your teacher account and assigns your sections and subjects. After sign-in, confirm those assignments before creating student work.
1. Choose your class and subject
On Dashboard, check the class and subject selectors. The cards, upcoming work, and class information use your selection.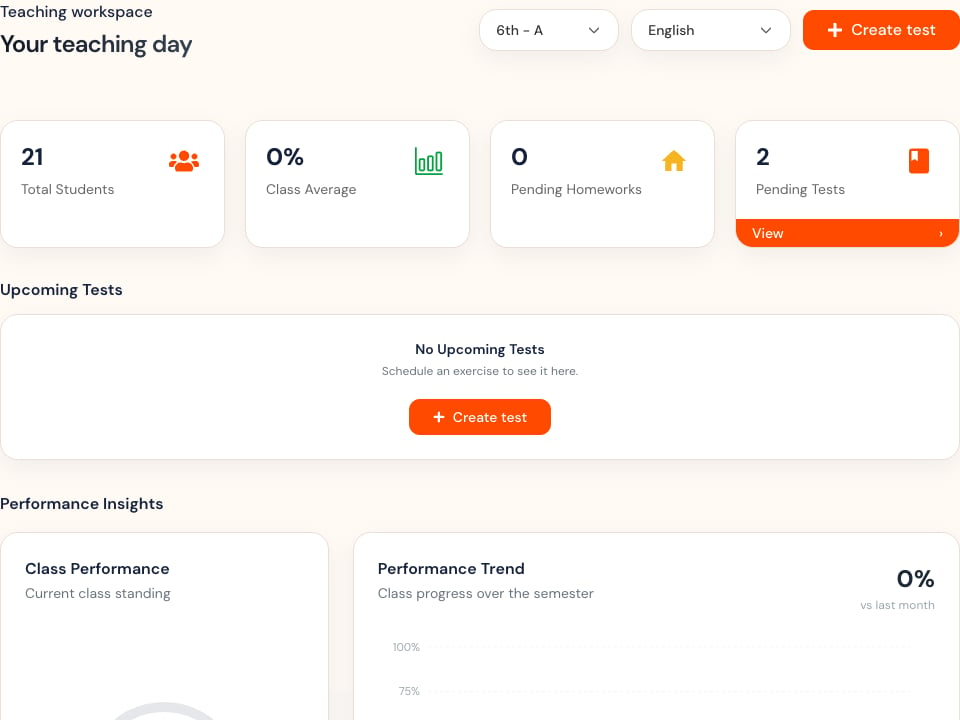
Screenshots use example data. Your classes, subjects, dates, and numbers will differ.
2. Review your workspace
The primary navigation can include:- Dashboard for class activity and performance.
- Tests for test creation, status, submissions, and analysis.
- Homework for assignment workflows.
- Sections for assigned class groups and rosters.
- Help for assistance.
3. Prepare your first test
Open Tests and select New Test. Choose between creating a test from curriculum selections and uploading an existing paper.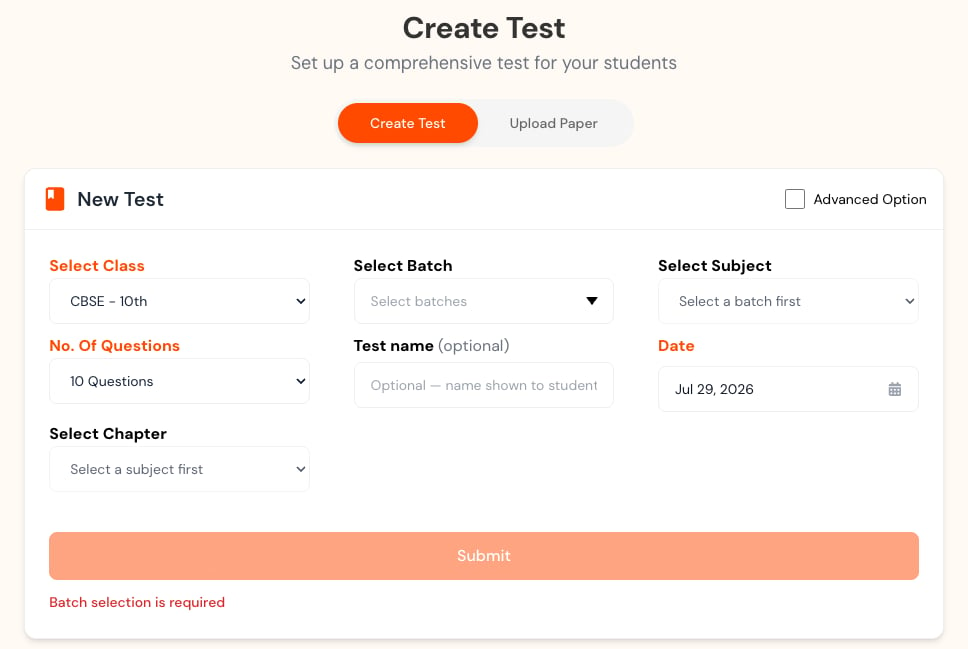
- Select the intended class and section.
- Choose the subject and curriculum scope.
- Confirm the question count and date.
- Use a recognizable test name.
- Review any advanced options.
4. Preview before students receive it
Check every question, option, answer, mark, diagram, and instruction. For an uploaded paper, check the questions after the app reads the file.5. Monitor and publish
Use View students to see who has submitted. Check marking and any re-checks before sharing results. Students see results only after you publish them.What to read next
Create tests
Follow the complete create or upload workflow.
Manage statuses
Understand what each status means and what to do next.
Review submissions
Track completion and inspect learner work.
Use analytics
Turn results into instructional next steps.